Knowing how to replace an RV awning is an essential maintenance skill that can save you hundreds in repair costs. Over time, awnings wear out due to exposure to the sun, wind, or heavy rain. While the process might look intimidating, replacing an awning is achievable with patience, the right tools, and an extra pair of hands. This guide walks you through measuring, removing, and installing your new fabric efficiently.
Guide Table: How to Replace an RV Awning
| Step | Task | Description |
|---|---|---|
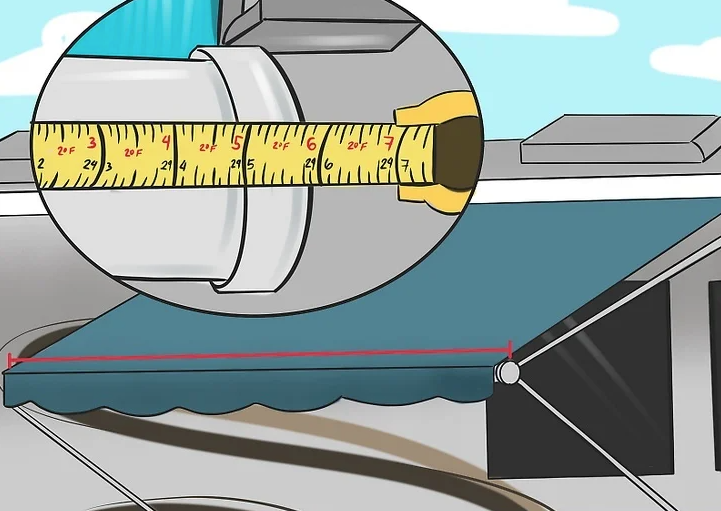
| 1. Prepare the New Fabric | Measure and purchase new awning material. | Ensure the fabric matches your RV’s width between end caps. |
| 2. Remove Old Assembly | Unbolt and detach the awning roller tube. | Extend arms and gently slide the old fabric off the track. |
| 3. Install the New Fabric | Slide and center fabric on roller tube. | Use silicone spray to ease fabric insertion. |
| 4. Reassemble and Secure | Rivet the roller back and tighten the spring. | Reattach bolts and test the awning roll-out motion. |
Extending the RV Awning
Begin by purchasing a replacement awning fabric measured from the inside edges of both end caps. Choose a tight-weave vinyl fabric for durability. Remove the four main bolts connecting the awning to your RV’s upper wall using a cordless drill. Then, unscrew the two small screws securing the fabric in its metal track. Detach the awning arms from their base brackets, lower them to the ground, and extend the awning one foot outward by flipping the roller’s control lever. This creates enough room to remove the existing fabric safely.
Removing the Roller Tube from the RV
Before detaching the roller, protect your RV’s surface by covering metal edges with masking tape. Insert a flathead screwdriver at the end of the fabric track to gently spread it open for easy sliding. With two helpers, hold the roller tube several inches above the ground and carefully walk it out of the track. If the fabric sticks, a third person can pull it along from a ladder while you support the tube below. Once the tube is free, lay it on a clean tarp or cinder blocks to prevent scratches.
Removing the Awning Fabric
Lock the rear spring by inserting a screwdriver into the end cap to prevent sudden unwinding. Remove the right awning arm by loosening its bolt, then release spring tension using a vise grip while counting the number of rotations. Mark the control lever’s position with a felt marker to ensure accurate reassembly. Drill out the rivets holding the end cap, remove both sides, and slide out the spring assembly. Unwind the old fabric carefully, cutting it into two pieces if it sticks to the roller for smoother removal.
Attaching the New Fabric
Spray silicone lubricant into both roller channels before sliding in the new fabric beads. Align the main awning with the straight-marked channel and the valance with the one marked “V.” Center the fabric precisely between the endcaps before rolling it counterclockwise onto the roller tube. Once smooth, reinsert the spring assembly, aligning holes and securing it with new pop rivets. Retighten the spring by rotating counterclockwise the same number of turns noted earlier. Finally, reattach the right arm, secure all bolts, and fasten the roller tube back to the RV.
Tips
- Always have two helpers when handling the roller tube for safety.
- Use masking tape on all sharp metal edges to prevent scratches.
- Lubricate channels with silicone spray, not grease, to avoid residue buildup.
- Choose vinyl or acrylic fabric designed for UV protection.
Things You’ll Need
- Cordless drill and drill bits
- Rivet gun and pop rivets
- Vice grips
- Razor knife
- Silicone spray lubricant
- Wrenches (open-end and Allen)
- Phillips screwdriver
- Replacement awning fabric
- Masking or electrical tape
Replacing an RV awning might take an afternoon, but following these steps ensures a clean, safe, and professional finish. With patience, care, and preparation, you’ll enjoy shade and comfort on your next outdoor adventure


