How to delete Google Chrome from Mac is a common question among users who want to free up space, fix browser issues, or switch to a different browsing experience. Chrome is widely used and powerful, but it also stores a large amount of data across multiple system locations. Simply removing the app icon does not fully erase its footprint from macOS.
Chrome creates background agents, caches, logs, cookies, and update services that remain even after the app is deleted. Over time, these leftover files can consume disk space, affect performance, or cause conflicts if Chrome is reinstalled later. For users concerned about privacy, performance, or system cleanliness, a complete uninstall matters.
This guide explains how to delete Google Chrome from Mac using both automated and manual methods. It also covers preparation steps such as backing up your system and monitoring performance afterward. Whether you want a one-click solution or prefer manual control, these steps ensure Chrome is removed safely and thoroughly.
Before You Uninstall Google Chrome on Mac
Chrome behaves differently from many other Mac apps because it installs supporting files in several Library folders. Removing only the main app leaves behind data that macOS does not clean automatically.
Before uninstalling, it is smart to prepare your system. A backup protects important files, and having the right tools ensures no remnants remain. Many users also uninstall Chrome due to high CPU usage or memory consumption, which makes monitoring tools useful after removal.
One-Click Method to Delete Google Chrome from Mac
The simplest way to completely remove Chrome is by using a dedicated uninstaller.
CleanMyMac removes Chrome along with all related files that normally stay hidden. This includes caches, logs, cookies, saved site data, background agents, and update services.
To delete Google Chrome from Mac using CleanMyMac:
Install and open CleanMyMac.
Go to Applications and run a scan.
Open Manage My Applications.
Find Google Chrome and select it.
Click Uninstall and confirm.
This process removes the browser and all its supporting files in one action. It is ideal for users who want speed, safety, and completeness without navigating system folders manually.
Why Manual Chrome Removal Takes Extra Steps
Manual uninstallation gives full control but requires careful handling. Chrome stores data in several locations within the user Library, and deleting the wrong files can affect other Google apps.
Before proceeding, creating a backup is strongly recommended.
Get Backup Pro allows users to create full, cloned, incremental, or versioned backups. This ensures you can restore files quickly if something important is removed by mistake.
How to Delete Google Chrome from Mac Manually
After backing up your Mac, follow these steps carefully.
First, quit Google Chrome completely. Make sure it is not running in the background.
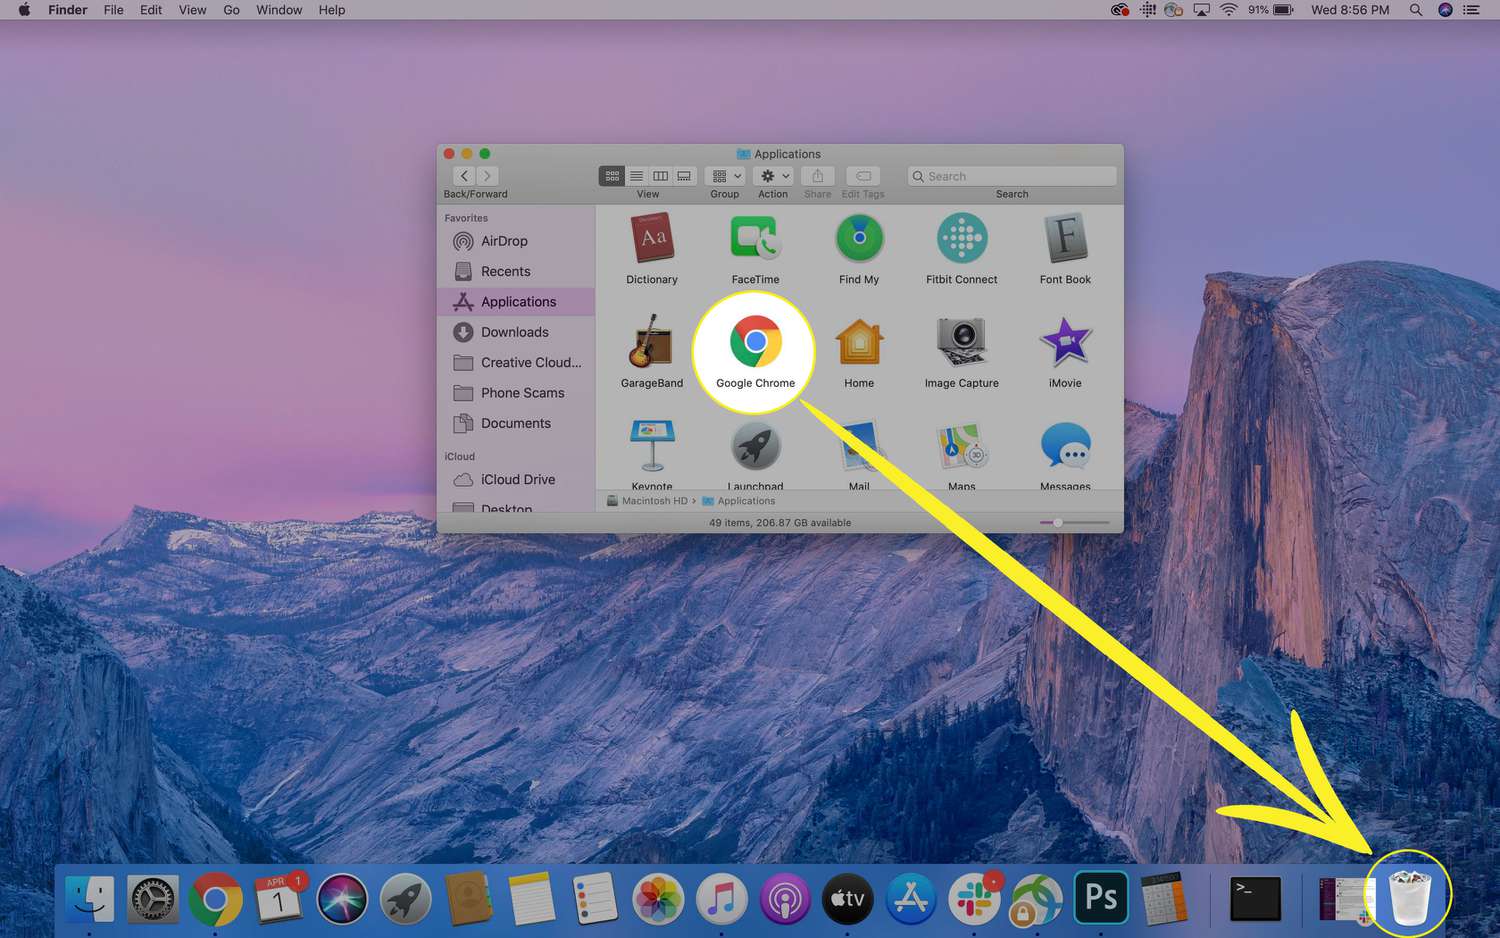
Open Finder and go to Applications.
Locate Google Chrome, right-click it, and choose Move to Trash.
Empty the Trash to remove the main app.
Next, remove Chrome’s support files.
In Finder, select Go from the menu bar, then Go to Folder.
Enter ~/Library/Application Support/Google/Chrome and press Return.
Delete the entire Chrome folder.
Chrome also installs an update agent that runs silently in the background.
Again, open Go to Folder.
Enter ~/Library/Google/.
Find GoogleSoftwareUpdate (sometimes called Keystone) and move it to Trash.
Finally, empty the Trash again. At this point, Chrome and its leftover files should be fully removed from your Mac.
Monitoring Your Mac After Removing Chrome
Some users uninstall Chrome due to excessive CPU usage, overheating, or battery drain. After removal, monitoring system performance helps confirm the issue is resolved.
iStat Menus provides real-time insights into CPU load, memory usage, disk activity, temperatures, and network traffic. With constant visibility from the menu bar, users can quickly identify apps that consume unusual resources.
Monitoring your Mac after uninstalling Chrome ensures system stability and helps prevent similar issues with other applications.
Managing Multiple Browsers More Easily
Some users remove Chrome because juggling multiple browsers becomes frustrating. Managing dozens of open tabs across different browsers can slow productivity.
Tab Finder simplifies navigation by listing open tabs from supported browsers in one place. Instead of switching browsers manually, users can search and jump directly to the tab they need.
This approach often reduces the need to uninstall browsers purely for workflow reasons.
Common Reasons to Delete Google Chrome from Mac
Users uninstall Chrome for many practical reasons.
Some prefer other browsers with different interfaces or tighter macOS integration.
Others experience bugs, crashes, or unusually high CPU usage.
Privacy-conscious users may choose browsers that collect less data.
System resets or fresh starts often involve removing third-party apps.
Some users want better syncing between Mac and iOS using Safari.
Understanding your reason helps determine whether a full uninstall or a reset is the best approach.
Resetting Chrome Without Uninstalling
If the goal is troubleshooting rather than removal, resetting Chrome may be enough. Resetting restores default settings, disables extensions, and fixes many performance issues without deleting bookmarks or saved passwords.
However, resetting does not remove all stored files, which is why full uninstallation remains the better choice for privacy or system cleanup.
What Happens After You Delete Chrome
When Chrome is removed, macOS switches to another default browser, usually Safari unless another browser is set. Links will continue to open normally, and synced Chrome data remains stored in your Google account if you sign back in later.
Deleting Chrome does not erase your Google account or cloud-stored bookmarks unless you manually remove them.
Reinstalling Chrome Later
You can reinstall Chrome at any time by downloading it from Google’s official website. Performing a clean uninstall first ensures the new installation starts fresh, without corrupted files or conflicting settings.
Key Takeaways for Chrome Removal on Mac
Knowing how to delete Google Chrome from Mac properly helps maintain performance, privacy, and system stability. Automated tools offer convenience and completeness, while manual methods give full control when done carefully. Backups and monitoring tools add safety and confidence throughout the process.


