
How to transfer photos from iPhone to Mac easily becomes an important question once your photo library starts growing faster than your storage. iPhones make it effortless to take high-quality photos and videos, but keeping everything only on your phone is rarely sustainable long term.
Many people want to move photos to a Mac for editing, long-term storage, or backup. Others need a fast way to clear space before a trip, a shoot, or a big update. The good news is that Apple offers several built-in ways to transfer photos, and there are also smart tools that simplify the process when things get more complex.
In this guide, you’ll learn seven reliable methods to transfer photos from iPhone to Mac easily. Some work best for quick wireless sharing, while others are ideal for large albums or full photo libraries. You’ll also see how to avoid duplicates and keep storage under control as your collection grows.
Method 1: The Easiest Way to Transfer Photos Using AnyTrans for iOS
If you regularly move large photo libraries or want more control over how files are organized, AnyTrans for iOS is one of the most flexible solutions.
AnyTrans for iOS works as a device manager, letting you move photos, videos, and albums directly from your iPhone to your Mac without relying on iCloud storage limits.
Steps to transfer photos with AnyTrans for iOS:
Open AnyTrans for iOS on your Mac
Connect your iPhone using a USB cable and allow access
Open Device Manager
Select Export iPhone Content to Computer
Choose Photos and start the transfer
Photos arrive neatly organized on your Mac, making this method especially useful for big transfers or repeated backups.
Method 2: Transfer Photos From iPhone to Mac Using Finder
If your Mac runs macOS Catalina or later, Finder replaces iTunes for device syncing.
Steps:
Connect your iPhone to your Mac with a cable
Open Finder and select your iPhone under Devices
Click the Photos tab
Choose Sync photos
Select all photos or specific albums
Click Apply
Finder works best if you prefer syncing entire libraries rather than picking individual images.
Method 3: Import Photos Using iCloud Photos
iCloud Photos keeps your photo library automatically updated across devices.
Steps on iPhone:
Open Settings
Go to Photos
Turn on iCloud Photos
Steps on Mac:
Open the Photos app
Go to Photos in the menu bar
Open Settings
Select the iCloud tab
Turn on iCloud Photos
Once enabled, photos appear automatically on your Mac. Keep in mind that Apple only provides limited free storage, so large libraries may require a paid plan.
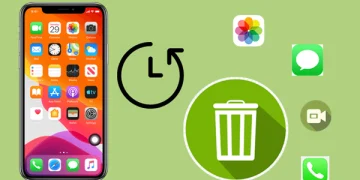
Method 4: Remove Duplicates Before or After Transferring
As libraries grow, duplicates become unavoidable. Removing them saves both device and cloud storage.
CleanMy®Phone scans your iPhone for duplicate and similar photos, helping you clean up before syncing or transferring.
Basic workflow:
Install CleanMy®Phone on your iPhone
Run a scan
Review suggested duplicates
Remove unnecessary copies
This step is especially helpful before using iCloud or transferring large albums.
Method 5: Transfer Photos Wirelessly Using AirDrop
AirDrop is ideal for quick, cable-free transfers.
Steps:
Enable AirDrop on iPhone in Settings > General > AirDrop
Enable AirDrop on Mac via Finder
Ensure both devices use Wi-Fi and Bluetooth
Select photos on your iPhone
Tap Share and choose your Mac
Save files on your Mac
AirDrop works best for small batches of photos rather than entire libraries.
Method 6: Import Photos Using the Photos App on Mac
The Photos app allows manual importing directly from your iPhone.
Steps:
Connect your iPhone to your Mac
Unlock your iPhone and tap Trust if prompted
Open Photos on Mac
Select your iPhone under Devices
Choose Import Selected or Import All New Items
This method is straightforward and works well if you already manage photos in Apple Photos.
Method 7: Transfer Photos Using Dropbox
Cloud storage services also work for photo transfers.
Steps:
Upload photos to Dropbox from your iPhone
Open dropbox.com on your Mac
Download selected photos or folders
Dropbox is useful if you already rely on cloud storage, but free plans may not handle large libraries well.
Method 8: Upload Photos Using Image Capture
Image Capture is a built-in macOS utility designed for importing photos from devices.
Steps:
Open Image Capture on your Mac
Connect your iPhone with a cable
Select your iPhone
Choose photos or select all
Pick a destination folder
Click Download
Image Capture is efficient for bulk transfers and preserves original file quality.
Choosing the Best Method Based on Your Needs
Each method fits a different situation.
AirDrop works best for quick, wireless sharing
Finder and Photos are reliable for Apple-centric workflows
iCloud is ideal for automatic syncing
Image Capture offers raw control over file placement
AnyTrans for iOS is best for large libraries, selective transfers, and repeated use
If you often move photos and videos between devices, combining transfer tools with cleanup apps saves time and storage.
Managing Photos Efficiently With Setapp
Using multiple tools individually can become expensive. Setapp bundles photo transfer tools, duplicate cleaners, and editors under one subscription.
With Setapp, you can access AnyTrans for iOS, CleanMy®Phone, and many other productivity tools with a single plan and a free trial period.


