Taking an iPhone screenshot has become second nature for many users, yet the device offers far more screenshot options than most people realize. From saving receipts and chats to capturing entire web pages or extracting stills from videos, screenshots play a central role in daily iPhone use. Because Apple designs iPhones with different button layouts and accessibility features, the exact method can vary depending on your model and personal preferences.
The good news is that once you understand how an iPhone screenshot works, you can choose the method that feels fastest and most comfortable. Newer iPhones rely on side buttons and gestures, while older models still use the Home button. On top of that, Apple has added hands-free options such as Back Tap, AssistiveTouch, and Siri, which are especially useful for accessibility or convenience.
This guide explains how to take a screenshot on iPhone step by step, covering all models and built-in methods. You will also learn how to capture full-page screenshots, grab cleaner images from videos, and manage the screenshots that quickly pile up in your Photos app. Whether you are using the latest iPhone or an older model, this walkthrough ensures you never miss an important screen again.
Ways to take an iPhone screenshot
Apple provides several screenshot methods, allowing you to choose between physical buttons, gestures, or voice commands. Each method produces the same result, so the best choice depends on comfort, accessibility needs, and how often you take screenshots.
How to take a screenshot on iPhone using buttons
This is the fastest and most common iPhone screenshot method, and it works instantly without changing any settings.
On iPhones without a Home button, press the Side button and the Volume Up button at the same time. Release both buttons quickly. The screen flashes, and a thumbnail appears in the lower corner. If you tap it, you can edit or share the screenshot. If you ignore it, the image saves automatically to Photos.
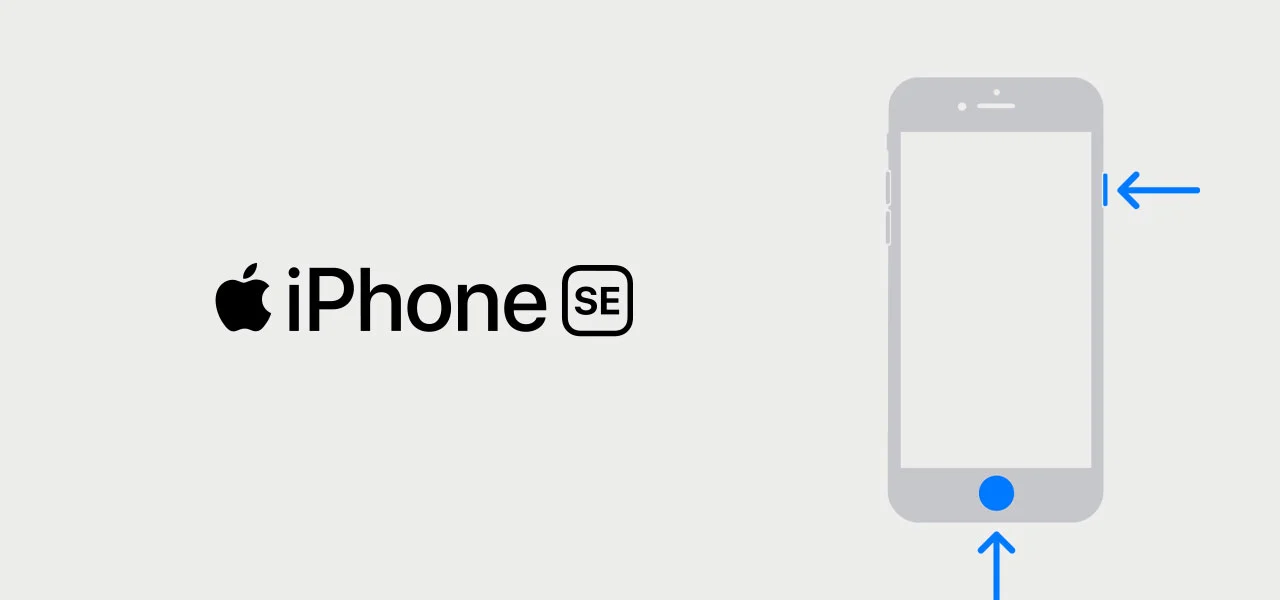
On iPhones with a Home button, press the Home button and the Side button together. Older models with a top Power button use the Home button plus the Power button instead. The behavior is the same across models, even though the button placement differs.
How to take a screenshot using Back Tap
Back Tap allows you to take an iPhone screenshot by tapping the back of your device. This option is helpful if pressing buttons feels awkward or uncomfortable.
To enable it, open Settings, go to Accessibility, tap Touch, then choose Back Tap. Select Double Tap or Triple Tap and assign it to Screenshot. Once enabled, tap the center of the iPhone’s glass back to capture the screen. The screenshot saves instantly, just like the button method.
How to take a full-page screenshot on iPhone
A full-page iPhone screenshot captures an entire web page or document instead of just what appears on screen. This feature works best in Safari and supported apps.
First, take a regular screenshot. Tap the thumbnail preview, then select Full Page at the top of the screen. You can scroll through the entire page and save it as a PDF. This method is ideal for saving long articles, receipts, or research material without stitching multiple screenshots together.
How to take screenshots with AssistiveTouch
AssistiveTouch adds a floating on-screen button that provides quick access to system actions, including screenshots. This is useful if physical buttons are hard to press or unreliable.
Enable it by opening Settings, going to Accessibility, selecting Touch, and turning on AssistiveTouch. A small circular button appears on your screen. You can customize its actions so that a tap, double-tap, or long press instantly takes an iPhone screenshot.
How to take a screenshot using Siri
Siri offers a completely hands-free way to capture your screen. Once Siri is enabled, simply say “Hey Siri, take a screenshot.” The image saves automatically to Photos.
This method is especially helpful when your hands are occupied or when accessibility is a priority. It also works across all iPhone models that support Siri.
How to take screenshots on older iPhones
Older iPhone models follow the same basic concept but use different button combinations.
On iPhones with Touch ID and a Home button, press the Home button and the Side button at the same time. On very old models with a top Power button, press Home and Power together. Release quickly, and the screenshot saves to Photos.
Taking screenshots from videos
Standard screenshots taken during video playback can appear blurry, especially with fast motion. For cleaner results, it is better to pause the video before capturing the screen. If you frequently need high-quality stills, dedicated video-to-image tools provide sharper results than basic screenshots.
Where iPhone screenshots are saved
All iPhone screenshots are automatically saved in the Photos app. They also appear in a dedicated Screenshots album, making them easier to find. Over time, this album can grow large, so periodic cleanup helps free storage space and keep your library organized.
Managing screenshot clutter
Screenshots accumulate quickly, especially if you capture messages, receipts, and social posts often. Reviewing and deleting unnecessary screenshots regularly prevents storage waste and keeps Photos easy to navigate. Organization tools can also group screenshots separately from photos and videos for faster cleanup.
Why knowing multiple screenshot methods helps
Learning more than one iPhone screenshot method gives you flexibility. Button combinations are fast, Back Tap is convenient, AssistiveTouch supports accessibility, and Siri enables hands-free capture. Together, these options ensure you can take screenshots comfortably in any situation.
Understanding how to take a screenshot on iPhone is not just about convenience. It also helps you capture information accurately, preserve important moments, and work more efficiently across apps and devices.