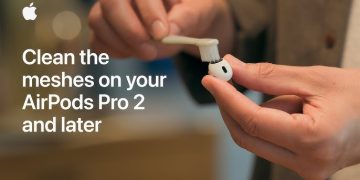
AirPods Pro are known for their exceptional sound quality and active noise cancellation features, but to truly experience their full potential, you need the perfect fit. One of the most important components of ensuring that perfect fit is the ear tips. The AirPods Pro come with multiple sizes of silicone ear tips to provide a comfortable and secure fit for different ear shapes and sizes. Knowing how to properly remove and attach the ear tips is essential for maintaining your device’s performance and comfort.
Whether you’re swapping out old ear tips for a fresh pair, trying a different size for a better fit, or cleaning them regularly, this guide will walk you through the simple steps to remove and attach ear tips on your AirPods Pro. With just a few easy steps, you can customize the fit to enjoy your music, calls, or podcasts with the best sound quality and comfort.
How to Remove and Attach Ear Tips on AirPods Pro
1. Removing the Ear Tips
The first step to getting the right fit for your AirPods Pro is to remove the existing ear tips. Apple has designed the ear tips to be easy to remove and replace, but it’s important to do it carefully to avoid damaging the AirPods Pro.
- Hold the AirPods Pro by the Stem
Grip the AirPods Pro gently by the stem (the part that sticks out from your ear) to get a firm but gentle hold. Be sure to avoid squeezing the earbud itself, as this could damage the internal components. - Pull the Ear Tip Off
Use your fingers to grasp the silicone ear tip. You should be able to easily pull it away from the AirPods Pro. Be gentle when pulling to avoid damaging the ear tip or the earbud. The ear tip is held in place by a soft plastic ring, so a gentle tug should release it without issue. - Check for Debris
After removing the ear tip, check the AirPods Pro for any remaining debris or earwax. It’s a good idea to wipe the stem and the inside of the earbud with a dry, soft cloth before attaching a new ear tip.
2. Attaching New or Cleaned Ear Tips
Once you’ve removed the ear tips, you can attach a new pair or cleaned ones. AirPods Pro come with three different sizes of silicone ear tips (small, medium, and large), so you can select the size that fits your ears best.
- Choose the Correct Size Ear Tip
To ensure the best fit, choose the ear tip size that feels most comfortable for you. If you’re not sure which size to pick, Apple suggests trying each size to see which provides the best balance of comfort and noise isolation. If you’re unsure, the medium size is the default and fits most users. - Align the Ear Tip with the AirPods Pro
Once you’ve selected the right size ear tip, take the silicone ear tip and align it with the small plastic connector inside the earbud. You’ll notice the ear tip has a small circular opening that fits onto this connector. - Push the Ear Tip onto the Connector
Gently push the ear tip onto the plastic connector on the AirPods Pro. You should feel it click into place when it is securely attached. Make sure the ear tip is fully attached to avoid it coming off during use. - Double Check the Fit
After attaching the ear tip, double-check that it’s securely in place. Gently tug on the ear tip to make sure it doesn’t easily detach. This ensures that it will stay in place while you’re wearing your AirPods Pro.
Tips for Maintaining AirPods Pro Ear Tips
1. Cleaning the Ear Tips Regularly
To maintain a good fit and clean sound, it’s essential to clean your ear tips regularly. Over time, earwax and dirt can build up on the silicone, which can impact the sound quality and comfort.
- Remove and Clean the Ear Tips
Use a soft cloth or paper towel to wipe down the ear tips. For a deeper clean, gently rinse the silicone ear tips under warm water. Avoid using soap or any harsh chemicals. - Let the Ear Tips Dry Completely
After cleaning, let the ear tips dry completely before reattaching them to your AirPods Pro to prevent moisture from affecting the internal components.
2. Choosing the Right Ear Tip for Comfort
Choosing the right size ear tip is key to comfort, especially if you plan to wear your AirPods Pro for extended periods. A good fit helps with both comfort and sound quality by ensuring a proper seal that enhances noise isolation and bass response.
- Test Different Sizes
Don’t hesitate to try different sizes to find the one that fits best in your ears. Apple provides a small, medium, and large option, but you can also experiment with third-party ear tips designed for AirPods Pro if necessary.
3. Replacement and Spare Ear Tips
If you lose or damage your ear tips, don’t worry — Apple sells replacement ear tips for AirPods Pro. Consider keeping a spare set on hand so you can easily replace them if needed.
4. Avoid Using Harsh Chemicals
When cleaning the ear tips or the AirPods Pro themselves, avoid using harsh chemicals or abrasive materials that could damage the silicone or internal components of the earbud.
Why a Proper Fit Matters for AirPods Pro
Ensuring that your AirPods Pro are fitted with the right ear tips is crucial for both sound quality and comfort. A well-fitted ear tip will create a seal in your ear that maximizes noise cancellation, improves bass response, and keeps the earbuds securely in place. A poor fit can lead to discomfort, reduced sound quality, and potential issues with noise isolation.
Final Thoughts on Changing Ear Tips
Changing and maintaining the ear tips on your AirPods Pro is a simple yet important task that helps ensure the best audio performance and comfort. By following these easy steps, you can keep your AirPods Pro in top condition and enjoy the best sound possible. Whether you’re replacing worn-out ear tips, trying a different size for a better fit, or cleaning them regularly, taking care of this small but crucial part of your AirPods Pro will enhance your listening experience.