


SD cards (or Secure Digital Cards) are compact, flash-based storage media. Their small size, generous capacity, and wide versatility are exactly why they’ve become such a popular storage solution. As storage technology has advanced, SD card capacity has skyrocketed, from just a few megabytes in the early days to several terabytes now, and they’re widely used in all kinds of devices, including smartphones, cameras, game consoles, and e-readers
However, like any other storage device, accidental formatting of an SD card due to operational errors or other reasons is a frequent headache.
Read Also: 3 Best iPhone Data Recovery Apps to Count On in 2026
Why You Need to Format Your SD Card?
There are situations when formatting an SD card involves more than just deleting files. Actually, it’s a compatibility and maintenance step that keeps the card functioning properly on various devices. Formatting is often required rather than optional. The most common reasons you might need to format an SD card: fixing file system errors and corruption, resolving that annoying Windows prompt that tells you to format the card before use, boosting performance and stability, and more.
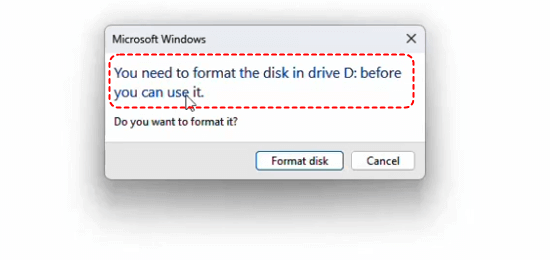
As you may know, formatting an SD card immediately removes access to all data on it. However, this does not always imply that the data is lost forever. The actual data stays on the card until it is replaced by new files; formatting typically only removes the file system references, rendering the data unreadable.
With the right and reliable recovery tools, the data can still be recovered effortlessly. So, before attempting data recovery, it is important to stop using the SD card immediately to avoid any new data being written to it.
Recommended Tool for Formatted SD Card Recovery
If you’ve mistakenly formatted your SD card, the immediate step is to stop writing any new data to it. This is crucial because new files can easily overwrite the ones you’re trying to get back. An effective file recovery software should operate in a read-only mode, yet still be capable of identifying every file you’ve misplaced. MyRecover is designed specifically for this kind of scenario, which makes it a perfect fit for recovering data from a formatted SD card. Here’s what makes MyRecover stand out:
Covers over 500 data loss situations, including recovery from deleted partitions, formatted hard drives, emptied Recycle Bins, inaccessible disks, system crashes, virus attacks, and more.
Supports recovery from over 500 types of storage devices, such as cameras, game console drives, SSDs, HDDs, USB flash drives, SD cards, and others.
Work with 1,000+ file types such as documents, photos, design files, videos, audio, archives, and Outlook data files.
AI-powered file recognition and recovery tech makes the whole process super easy and never miss a single file.
Runs a read-only scan to make sure no existing data on the SD card is overwritten during recovery.
Supports all the common file systems: NTFS, FAT32, exFAT, ReFS, Ext4, and others.
Read Also: Top Best Data Recovery Companies in California
4 Simple Steps to Recover Formatted SD Card with MyRecover
Recovering data from a formatted SD card is straightforward with a reliable tool. Before starting, remove the SD card from your phone, camera, or game console and connect it to your Windows computer using the built-in SD card slot or an external card reader.
Step 1. Download and Install
Go ahead and download MyRecover from the Microsoft Store or its official site onto your Windows computer—supports Windows 11, 10, 8.1, 8, 7, and Server 2025/2022/2019, etc. One thing to keep in mind: if you’re using something like a USB external hard drive, don’t put the software on the same drive where your data was lost.
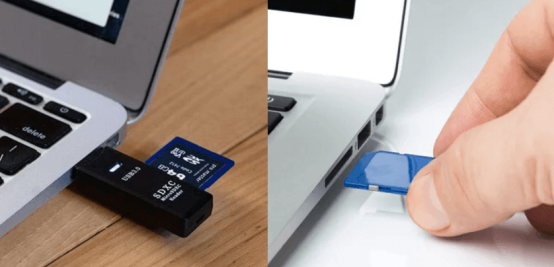
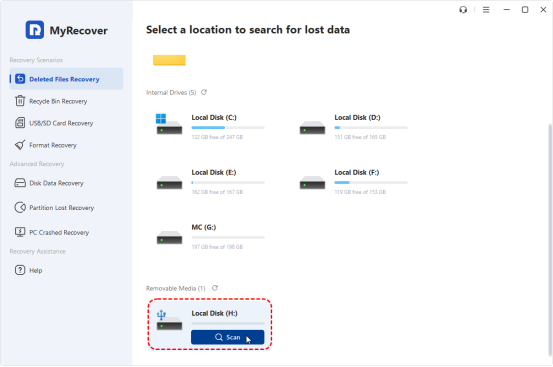
Step 2. Pick Your SD Card & Scan
Open the program, select the formatted SD card you want to scan for lost files, then click “Scan” to start looking for recoverable content. Once the quick scan finishes, click “Deep Scan” to dig up more leftover file bits.
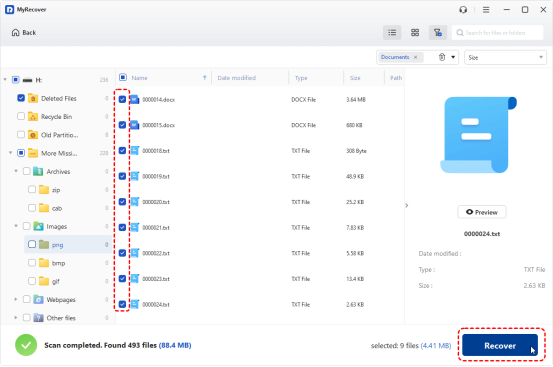
Step 3. Choose Files to Recover
Once the scan is complete, use the “Filter” option in the upper-right corner to find exactly the files you want. After selecting the files you want, click “Recover” to restore them right away.
Step 4. Save Recovered Files to a Safe Location
Pick a safe location to save, making sure it’s not the original SD card, then click “Select the Folder”.
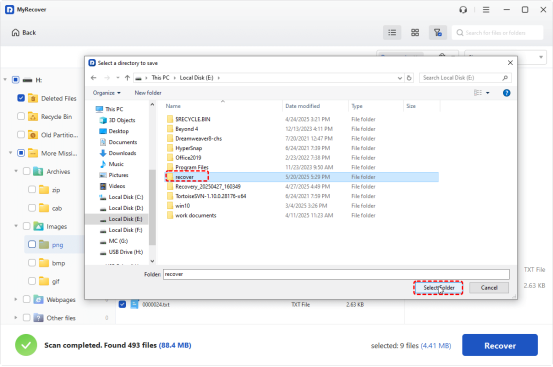
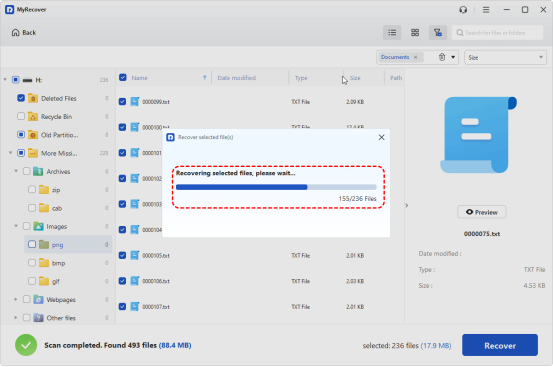
Once the process finishes, you’ll see a message that says “Files have been recovered successfully.” Click the destination folder link or the “Browse” button to view your recovered files immediately.
Summary
This is how you use MyRecover to recover a formatted SD card, step by step. Even if you’re not a tech person, these steps make getting your data back super easy. Need extra features like unlimited recovery, file previews, bootable recovery media? Go for MyRecover’s Professional or Technician Edition.
Read Also: List of top Data Recovery Companies in the Philippines


