Mac screenshots location is a question almost every Mac user asks at some point. Screenshots are part of daily workflows, whether you are saving receipts, capturing error messages, creating tutorials, or sharing quick visuals with colleagues. Yet many users take screenshots repeatedly without stopping to ask where those files are actually saved. When the time comes to find one specific image, confusion often follows.
By default, macOS saves screenshots automatically, but that default behavior is not always obvious. Screenshots can pile up on the desktop, disappear into folders you rarely open, or get scattered across different locations if settings change over time. This makes organization harder and slows down productivity, especially for users who rely on screenshots frequently.
Understanding Mac screenshots location helps in two important ways. First, it allows you to find screenshots instantly when you need them. Second, it gives you control over where new screenshots are saved, which keeps your Mac cleaner and easier to manage. Instead of cluttered desktops or endless searches, you can choose a system that fits how you work.
This guide explains exactly where screenshots go on Mac, how to change the save location, how to store screenshots in iCloud or cloud services, and how to find screenshots even when they seem lost. The steps apply to all modern Mac models, including MacBook Air and MacBook Pro, and cover both newer and older versions of macOS.
Where Are Screenshots Saved on a Mac by Default
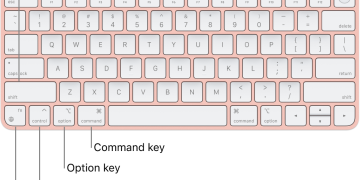
On modern versions of macOS, screenshots save to the Desktop by default. When you use common shortcuts like Shift + Command + 3 or Shift + Command + 4, macOS creates a PNG file and places it directly on your desktop.
On older versions of macOS, screenshots behave differently. Earlier systems used a utility called Grab, which saved screenshots to the Documents folder instead. If you upgraded your Mac over time, this explains why screenshots may appear in different places depending on when they were taken.
Regardless of macOS version, screenshots always save automatically unless you change the location manually or copy them to the clipboard.
How to Change Mac Screenshots Location Using Built-In Tools
macOS includes an easy way to change where screenshots are saved, as long as you are running macOS Mojave or later.
Press Shift + Command + 5 to open the Screenshot toolbar. Click Options, then look under Save to. You can choose common folders like Desktop, Documents, Downloads, or select Other Location to create or pick a custom folder.
Once selected, all future screenshots save to that location automatically. This method works for full-screen screenshots, selected areas, and screen recordings.
Changing the Mac screenshots location helps keep your workspace tidy and prevents screenshots from cluttering your desktop.
How to Change Screenshot Location on Older macOS Versions
If your Mac runs an older macOS version that does not support the Screenshot toolbar, you can still change the screenshot save location using Terminal.
Create a new folder anywhere on your Mac and name it something easy to remember, such as Screenshots. Open Terminal from Applications > Utilities. Type the command:
defaults write com.apple.screencapture location
After typing the command, drag your new folder into the Terminal window so its full path appears. Press Enter, then restart the system interface by logging out or restarting your Mac.
From that point forward, screenshots save to the new folder. You can repeat the process at any time to change locations again.
How to Save Screenshots to iCloud on Mac
Saving screenshots to iCloud adds automatic backup and cross-device access. This works best if your screenshots are stored in the Desktop or Documents folder.
Open System Settings, go to your Apple account, then open iCloud and enable iCloud Drive. Make sure Desktop & Documents Folders are turned on. When this option is active, any screenshots saved to those folders sync automatically to iCloud.
This setup allows screenshots to appear on other Apple devices signed into the same account, which is useful for users who work across multiple screens.
Using Apps to Manage Mac Screenshots Location Automatically
Some users want more control than macOS provides by default. Third-party tools can automate saving, organizing, and sharing screenshots.
CleanShot X allows you to hide desktop icons, choose custom save locations, and decide where each screenshot goes before saving. It also supports annotations and quick editing.
Dropshare focuses on automation. It uploads screenshots directly to cloud storage and generates shareable links. This works well for users who share screenshots frequently.
Xnapper helps improve the visual appearance of screenshots. It adds backgrounds, spacing, and styling for presentations and social sharing.
These tools reduce clutter and speed up workflows, especially for business and creative users.
How to Find Screenshots on Mac When You Cannot Locate Them
If you changed your Mac screenshots location in the past, finding older screenshots can feel difficult. Fortunately, macOS includes a powerful Finder search method.
Open Finder and press Command + F. Select This Mac to search your entire system. In the search bar, enter:
kMDItemIsScreenCapture:1
This search finds every screenshot on your Mac, regardless of where it is stored. Switching Finder to icon view makes browsing easier when you have many files.
This method works across modern macOS versions and is the fastest way to locate missing screenshots.
How to Copy Screenshots to Clipboard Instead of Saving
Sometimes you do not want screenshots saved at all. macOS allows copying screenshots directly to the clipboard.
Hold the Control key while using screenshot shortcuts. For example, Control + Shift + Command + 4 copies the screenshot instead of saving it. You can then paste the image into documents, chats, or editors without creating a file.
This approach works well for temporary screenshots and quick sharing.
Why Screenshots Sometimes Do Not Save on Mac
If screenshots do not appear where expected, settings may have changed. Open System Settings, go to Keyboard, then Keyboard Shortcuts, and check the Screenshots section. Make sure screenshot shortcuts are enabled.
Storage issues, permission problems, or third-party tools may also affect saving behavior. Running a system cleanup can help restore normal operation.
CleanMyMac helps remove clutter, detect duplicates, and free storage space. This improves overall performance and keeps screenshot folders manageable.
Frequently Asked Questions About Mac Screenshots Location
Do screenshots disappear on Mac?
Screenshots do not disappear, but their save location may change. Searching using Finder or Spotlight usually reveals them.
Where do screenshots go if I use clipboard shortcuts?
Clipboard screenshots are not saved as files. They remain in memory until pasted or replaced.
Why are screenshots not saving to Desktop anymore?
The save location may have changed through the Screenshot toolbar or Terminal. Press Shift + Command + 5 and check Options to confirm.