How to Write in Calligraphy. Calligraphy, which means “beautiful writing” in Greek, is an art form that spans thousands of years and countless cultures. Various styles include Western, Eastern Asian, Southern Asian, and Islamic calligraphy. While the styles may differ, all calligraphy uses the same basic principles to create beautiful lettering. Here’s how to get started with calligraphy in a few simple steps.
Method 1: Learning the Basics
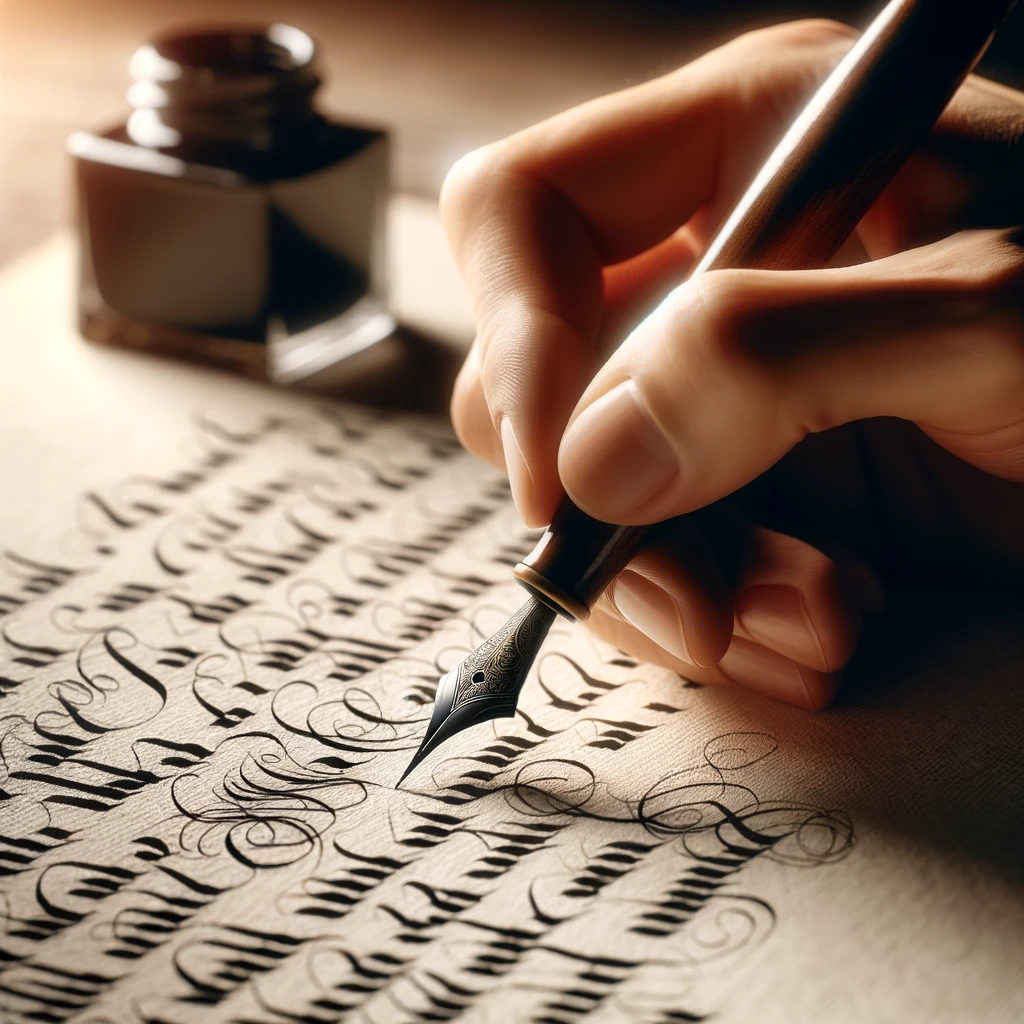
Step 1: Hold Your Pen Correctly
- Angle the Pen: Hold your pen diagonally at a 30 to 60 degree angle. The nib should point diagonally away from you, to the left, as you write.
- Maintain Orientation: Keep the nib’s orientation consistent, whether you’re making straight lines or loops.
Step 2: Move the Nib Properly
- Lead the Nib: Move the nib backwards or sideways, not forward, to avoid blotting and uneven letter formation.
- Apply Light Pressure: Use light, consistent pressure to avoid damaging the nib or creating messy letters.
Step 3: Maintain Parallel Lines
- Consistency: Keep your vertical, horizontal, and diagonal lines parallel to make your writing look more consistent and professional.
Method 2: Practicing Letters and Words
Step 1: Trace the Alphabet
- Trace Letters: Print a sample calligraphy alphabet and trace it with tracing paper until you can write the letters on your own.
Step 2: Use Correct Stroke Order
- Practice Strokes: Practice upward and downward strokes. Follow the correct stroke order for each letter, which varies by style (e.g., Western, Asian, or Islamic calligraphy).
Step 3: Use the Grid Method
- Grid Practice: Create a grid on a piece of paper and fill each square with repeated letters to practice consistency.
Step 4: Use Templates
- Templates: Use calligraphy templates to master letter formation and spacing. Templates can help prevent your letters and words from slanting.
Step 5: Practice Freehand
- Write Regularly: Practice writing notes, messages, or journal entries in calligraphy to get used to connecting different letters.
Method 3: Selecting Your Supplies
Step 1: Choose the Right Paper
- Smooth Paper: Use smooth, acid-free, archival paper to avoid catching or redirecting your pen. Avoid greasy or waxy paper.
Step 2: Get a Proper Writing Utensil
- Dip Pens: Consist of a handle and a metal nib, dipped in ink. Commonly used in Islamic calligraphy.
- Fountain Pens: Draw ink from a container within the pen. Common in Western calligraphy.
- Brushes: Used for Asian calligraphy, brushes vary in size and use the pressure and direction of strokes to form lines.
Step 3: Select the Best Ink
- Pot Ink: Common for calligraphy, comes premixed in a jar. India ink is popular.
- Fountain Pen Ink: Special dye-based ink for fountain pens.
- Ink Sticks: Require an ink stone and water to mix. Often used in Asian calligraphy.
Step 4: Use Rulers or Guide Instruments
- Guidelines: Use rulers or T-guides to create straight or curved lines for consistent writing.
Step 5: Keep Your Paper in Place
- Stabilize Paper: Use painter’s tape, weights, clips, or a drawing board to hold the paper steady while writing.
By following these steps and practicing regularly, you can develop your calligraphy skills and create beautiful, decorative handwriting. Enjoy the process and have fun exploring different styles and techniques!


